
Introduction
Microsoft Windows does not natively support Generic Routing Encapsulation (GRE) or IP-in-IP (IPIP) tunnels. The X4B tunnel client, available to all X4B customers, provides this functionality and fully encapsulates traffic to preserve your backend IP address.
You can download the client from your X4B Dashboard by choosing Action > Setup Tunnel for the relevant tunnel. It automatically configures your GRE or IPIP tunnel.
This guide is current for software version v4.0.x.
Notes
- Allow the required traffic for your services through Windows Firewall.
- The client has been tested primarily on Windows Server 2025, 2022 & 2019, and also on Windows 11.
- Both IP-in-IP and GRE tunnels are supported.
- An Ethernet (802.1 or 802.1Q) network connection is required.
- One client instance can manage multiple tunnels. Running multiple client instances is not supported. If you are running other applications using GRE or IP-in-IP on the system the argument
--sharedshould be provided (but no staff support will be provided for this setup)
Steps
Please follow the steps below carefully.
Step 1: Download the tunnel client
Create the required tunnel first if it does not already exist. On Tunnels, click Add Tunnel, select IP-in-IP in Tunnel type, enter your public Backend address, and click Save. Configure the application's ports with that tunnel as their Encapsulated backend. The same client also supports tunnels created with GRE.
Open Services, choose your service's Action > Tunnels, locate the tunnel, and select Action > Setup Tunnel. The tunnel must already be referenced by an Encapsulated port. Select Microsoft Windows, then Download Application. Save the customized wintunnel.zip and extract it on your Windows server.
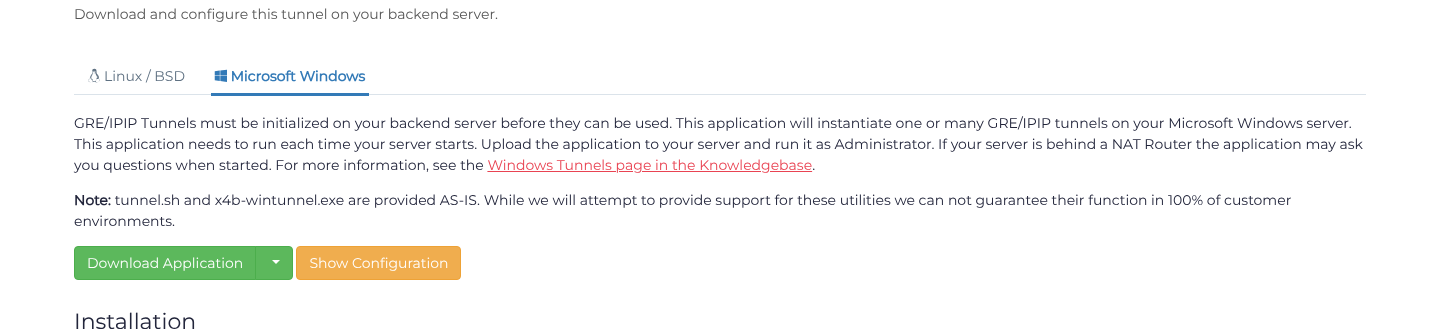
The download is a ZIP archive containing the .exe and its supporting files. Extract it and keep all of these files together in the same directory as the executable.
Step 2 (optional): Install a capture driver
From version 4.0.3alpha2 onward, Npcap is optional. The tunnel ZIP includes WinDivert, an alternative that provides comparable performance for most workloads. Keep the supporting files in the executable directory and Npcap should not be necessary.
Version 4.0.3alpha2 supports these adapters:
- Npcap — used by default when installed; requires the driver to be installed.
- WinDivert — bundled fallback adapter.
- WinPkFilter — requires the driver to be installed and is enabled only with
--encap.
Using & Installing Npcap
If you choose to use Npcap, download and install it from the Npcap downloads page. Npcap captures packets from the network adapter before the Windows networking stack processes them. WinPcap can also be used, but it offers lower performance. Install Npcap in WinPcap compatibility mode.Note: If the application cannot detect an adapter after installing Npcap, restart the server. A restart is required on some systems and is recommended after installation.
Using & Installing WinPkFilter
WinPkFilter is required only when you run the tunnel client with --encap. Download the latest driver installer from the official WinPkFilter download page, then right-click the installer and select Run as administrator. Complete the installer and accept any Windows driver prompts. Restart the server before starting the tunnel client with --encap.
License requirement: WinPkFilter is free only for personal, educational, and non-profit use. You must obtain an appropriate commercial license from NT Kernel before using it for a commercial service. Do not bundle or redistribute the driver unless your license expressly permits redistribution.
WinPkFilter can be incredibly fast on the right hardware, however hardware performance does seem to vary. Running WinPkFilter on a virtualised server is not recomm
Step 3: Run the tunnel client
Keep the extracted client in a permanent local directory, for example C:\X4B\WinTunnel, with all supporting files beside x4bwintunnel.exe. Right-click the executable and select Run as administrator, accepting the elevation prompt even if your signed-in account is an administrator. Verify that the tunnels start successfully before installing automatic startup.
Install the Windows service for boot startup
- In the running client's text interface (TUI), type
installin the command bar and press Enter. This is an interactive client command, not a command-line argument. Confirm that installation succeeds. If your client does not offer this command, download a current client before continuing. - The command registers a Windows service that starts on the next boot, without an interactive user signing in. Open Services (
services.msc), locate the installed tunnel service, and check that its Startup type is Automatic and its Path to executable points to your permanent client directory. - Keep the service account configured by the installer on the Log On tab. It must have the local privileges required to create tunnel interfaces and use the capture driver, plus read/execute access to the client directory. A custom account also needs Log on as a service. The service runs independently of your signed-in session and its working directory; keep dependencies beside the executable and use a local path rather than a mapped drive.
- On the service's Recovery tab, set First failure, Second failure, and Subsequent failures to Restart the Service, with Restart service after set to 1 minute, then apply the settings. These settings restart a failed service; they do not detect every loss of tunnel connectivity.
- After installation, opening
x4bwintunnel.exeas administrator lets you control the existing service. Use that interface or Services to manage the service. Confirm connectivity, then arrange a reboot test and verify the protected service from another machine before anyone signs in. A successful manual launch alone does not verify unattended recovery.
To remove the service registration, open x4bwintunnel.exe as administrator to control the installed service, stop the service, and enter uninstall in its TUI. Use this before moving or removing the client directory; reinstall from the final location if needed.
Windows Startup-folder entries and startup apps run when a user signs in, as described in Microsoft's startup-app guidance. Enabling Run this program as an administrator does not turn a sign-in entry into a boot-time service. Use the client's install command for unattended boot startup.
Conclusion & Testing
Your tunnel should now be online. From the Windows server, verify connectivity by pinging the EncapsulatedRemote address.
Running your web server, game server, or other service
Ensure that your service is bound to the 10.x.x.x tunnel interface on the server. You can find the backend tunnel IP address on the Tunnel Information page.
If your application cannot bind to a specific interface, you may need a third-party utility such as ForceBindIP.
As with Linux and BSD tunnels, binding your service to the tunnel IP ensures that traffic is sent and received through the protected IP address.
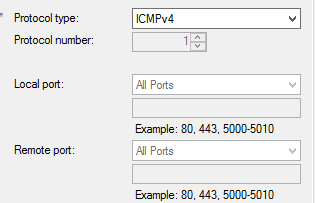
We also recommend adding an allow-all ICMPv4 rule in Windows Firewall with Advanced Security so that we can test connectivity to your backend. It should look similar to this:
NAT
If your server is behind NAT, or the local address shown in our interface is unavailable on the server, X4B WinTunnel will ask you to select an interface. It will bind to that interface's primary IP address. You must configure your router or NAT device so that GRE/IPIP traffic sent to the provided public address reaches the backend server.
Router and NAT configurations vary, so our ability to assist with these setups is limited. In some cases, placing the backend server in the router's DMZ may forward the required IP traffic to it.
Troubleshooting
Potential system overload
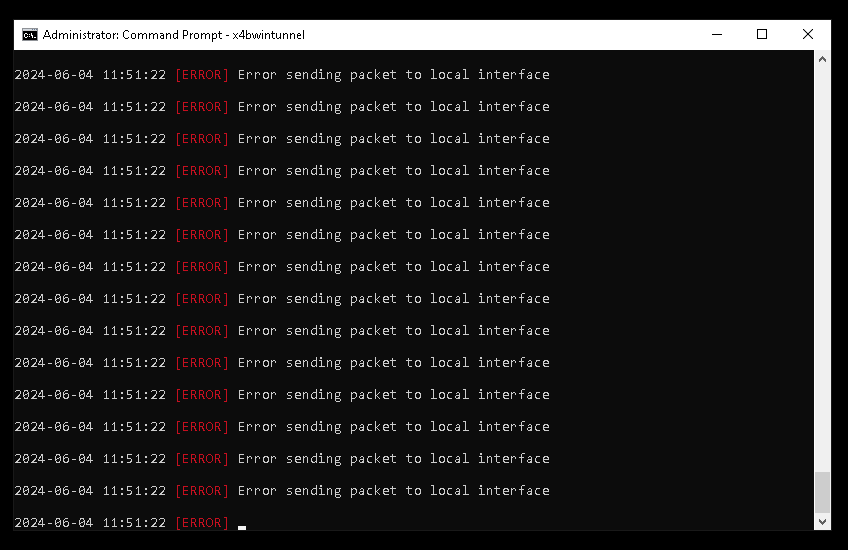
This usually indicates an incoming-traffic overload from the filtering network. Possible causes include an attack leak (temporary or persistent), high traffic levels to your application, or insufficient CPU capacity. The message means that the application did not have enough local buffer space for a received packet because the service had not processed traffic quickly enough.
Packet loss can occur during the first 20 seconds after the traffic load or tunnel starts, particularly while your service is warming up. X4B WinTunnel actively balances load and latency by grouping received packets according to observed traffic rates. It targets packet-group reads every 1–1.5 ms, which adds roughly 1,000 system calls per second. The client profiles traffic aggressively during its first 20 seconds and then adjusts to the observed rate. If traffic peaks adversely affect your service, consider adding filtering rules.
High System CPU Usage
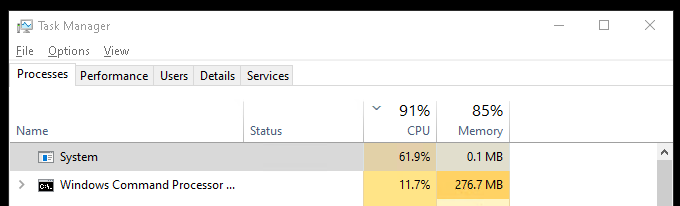
Higher-than-expected System CPU usage can indicate a moderately high rate of new connections. Windows is less efficient at connection tracking than Linux. To avoid load peaks, we recommend limiting new connections to fewer than 5,000 per second.
The application stops processing when text is selected
Depending on the console client and buffer size, selecting text can block the console and stop the application from processing data.
Solution: Avoid selecting text in the console window, and do not leave a console window with text selected.
High CPU Usage
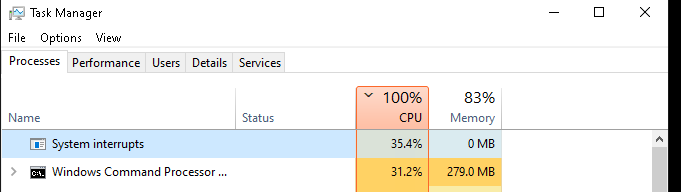
If the server is at 100% CPU usage, latency may increase. The client transfers larger packet groups to minimise packet loss where possible. It runs at high priority, but so do many Windows system processes.
Too fast content production
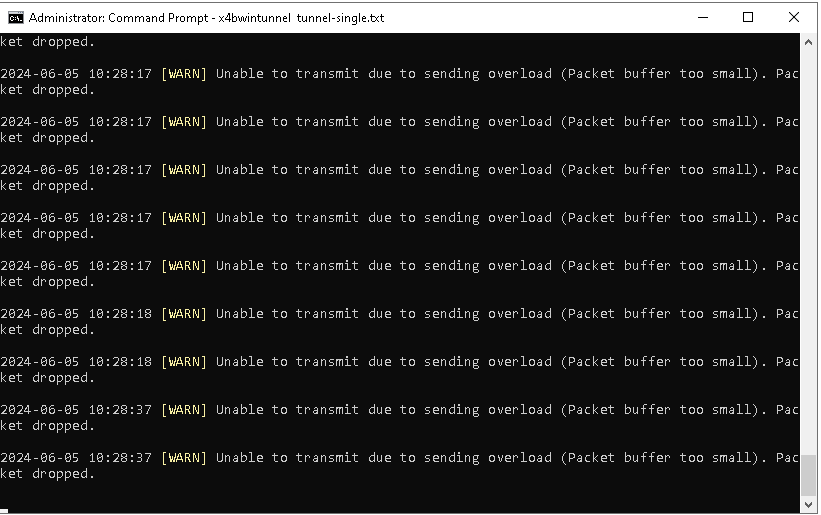
The backend is producing content faster than X4B WinTunnel can transmit it over the internet. This is uncommon, as the client should exceed typical transmission rates. In the example above, the testing server required 4.8 Gbps (440k packets per second) to reach this limit.
CPU Stolen
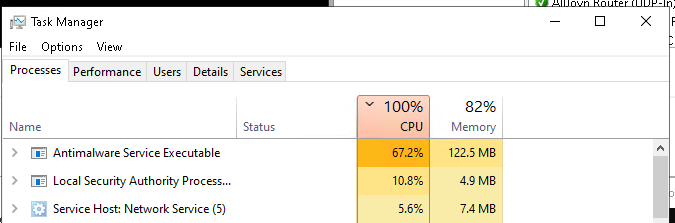
Monitor other applications, particularly Windows system processes, that consume CPU. They can cause latency spikes. This is especially important for X4B WinTunnel because excess packets are not buffered by the application. Also avoid disk paging or memory compression caused by memory pressure from other applications.
Performance & Expectations
If you can run your application on either Windows or Linux, Linux networking may provide better performance, even when the application requires Wine or another compatibility layer.
In our testing, Windows Server 2022 reaches approximately 140,000 packets per second per reasonably powerful CPU core. On a single-core system, the client achieved roughly 140,000 packets per core per second, with up to 40,000 new connections per second due to Windows limitations. A four-vCPU AMD VPS reached 480,000 packets per second in a version 4.0.0alpha5 benchmark. On this hardware, System Interrupts (the network driver and Npcap) consumed the most CPU, followed closely by the client.
The console application can make full use of up to three CPU cores. System interrupts and processes can also consume resources on other cores, so a multi-core system is beneficial.
Your workload and hardware will differ from our test environment, so actual performance will vary.
