
Layer 7 Blacklist and Whitelist Management
Layer 7 blacklist and whitelist pages allow you to manage IP-based access control for HTTP/HTTPS traffic on your ports.
Open the lists for a port
Open Services, choose Action → Ports, then Action → Filtering on your HTTP or HTTPS port. Under Layer 7: Trust Insights, choose Blacklist or Whitelist. If the application does not have a port yet, add and save an HTTP/HTTPS port with the correct backend first; this example uses HTTP port 8080.
Available Lists
Two types of lists are available for managing Layer 7 traffic:
Blacklist (Bans)
The Layer 7 blacklist allows you to block or restrict specific IP addresses from accessing your HTTP/HTTPS services. Banned IP addresses are handled with a Verification request. When a banned IP attempts to access your service, they will be presented with a verification challenge (such as a Proof of Work challenge or other automated verification). If the client successfully completes the verification challenge, the ban will be automatically removed, and the client can access your service normally. Bans automatically expire in a reasonable time.
This approach helps distinguish between legitimate clients (who may have been caught up in automated protection) and malicious actors (who typically cannot or will not complete verification).
Whitelist
The Layer 7 whitelist allows you to add temporary whitelists for specific IP addresses. All whitelist entries expire after a period of time. Whitelisted IPs may bypass certain validation steps and mitigation measures.
Regional Scope
Managing Entries
Viewing Entries
Each page displays a table of current entries showing:
- Address: The IP address
- Region: The region where the entry applies (with flag icon)
- Reason: Why the entry was added (may include a request ID linking to HTTP logs)
- Created At: When the entry was created
- Expired At: When the entry will expire (or "Currently Active" if still active)
- Status: Current status (Active/Expired)
Searching Entries
You can search for specific entries using:
- IP Address: Find all entries for a specific IP
- Request ID: Find entries associated with a specific HTTP request from your logs
Adding Entries
Add a ban
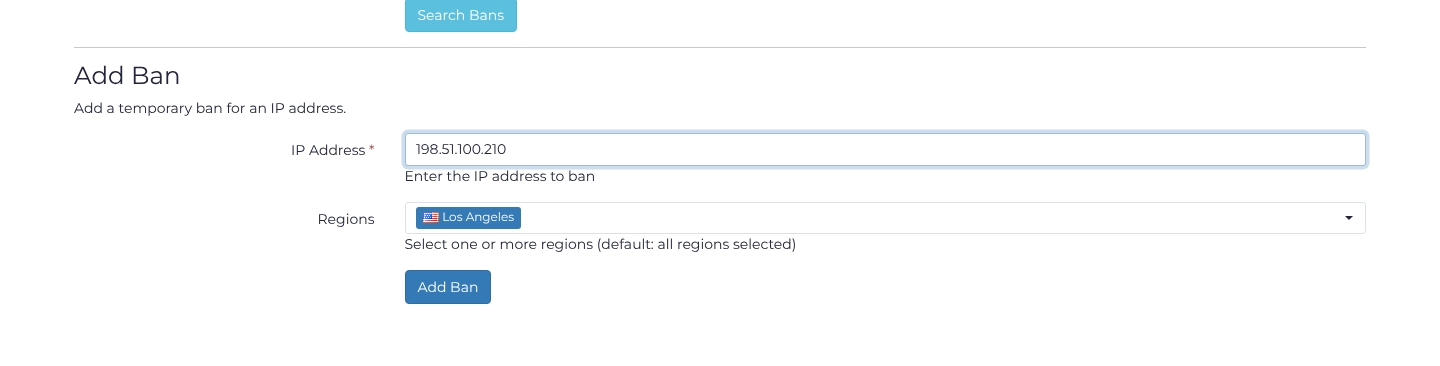
Open Blacklist. In Add Ban, enter the client IP Address and review Regions (all available regions are selected initially), then click Add Ban. This example uses 198.51.100.210; replace it with the intended client address.
Add a whitelist entry
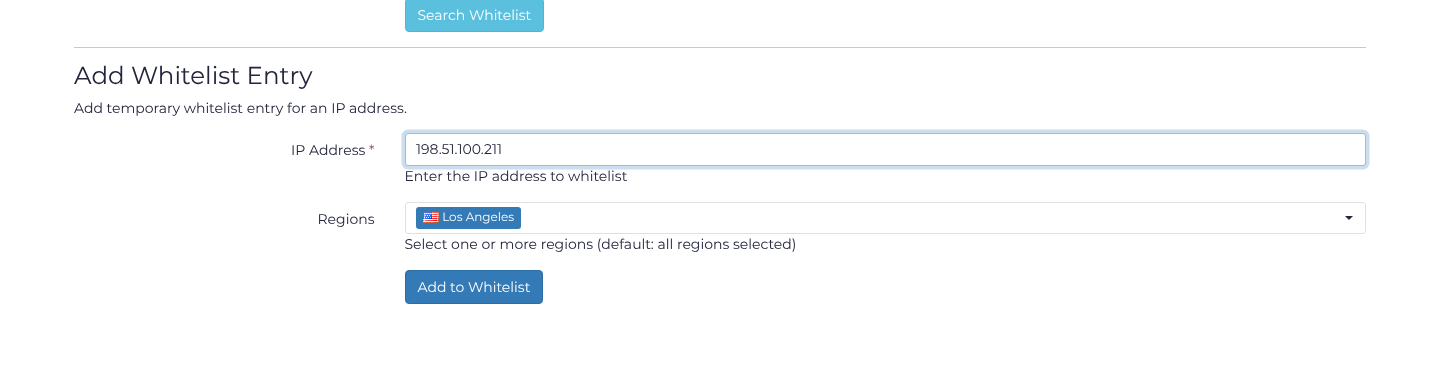
Open Whitelist. In Add Whitelist Entry, enter the client IP Address and review Regions, then click Add to Whitelist. This example uses 198.51.100.211; replace it with the intended client address.
Reload to confirm the new entry. Under Query Bans or Query Whitelist, enter the same IP Address and click Search Bans or Search Whitelist. Check the address, region and active status in the result. Changes may take a few moments to propagate across the network.
To remove an entry, open its row's Action menu and choose Remove Ban or Remove Whitelist. Reload and check that the entry is gone. Repeat for other regional rows when necessary.
Integration with Layer 7 Protection
Layer 7 bans and whitelists work alongside other Layer 7 protection features:
